

A deck that dips when you walk across it isn’t just annoying. It’s a sign that something underneath has already failed. Learning how to fix a sagging deck starts with figuring out where the structure gave way, whether that’s a joist, a beam, a post, or the footing holding it all up. That’s the mistake most homeowners make first. They replace a few boards without checking what’s underneath.
This guide covers the real fixes, from sistering or replacing sagging joists to reinforcing beams, correcting ledger connections, and repairing sinking footings. As experienced deck building contractors, we’ll help you learn how to inspect each part of the frame and match the repair to the actual cause. By the end, you’ll know exactly where your deck’s problem starts.
How to Fix a Sagging Deck
To fix a sagging deck, identify the failed component first, then make the appropriate repair.
- Replace damaged decking boards – Swap cracked, warped, or rotted boards causing surface dips.
- Repair or replace damaged joists – Sister weakened joists or replace joists with severe damage.
- Fix joist hangers and connections – Replace loose, damaged, or corroded hardware that allows movement.
- Add blocking or bracing – Install blocking between joists to reduce bounce and improve stability.
- Repair or replace failing beams – Reinforce or replace sagging or overloaded beams.
- Replace damaged posts – Correct leaning, rotted, or unstable supports under the deck.
- Repair failed footings – Stabilize sinking or shifted supports with proper footings or piers.
- Fix ledger board issues – Repair loose connections, missing flashing, or water damage.
- Replace worn hardware – Upgrade rusted fasteners and connectors with exterior-rated hardware.
- Inspect the full frame – Confirm all structural components are aligned and properly supported.
Sagging Deck vs Sinking Deck
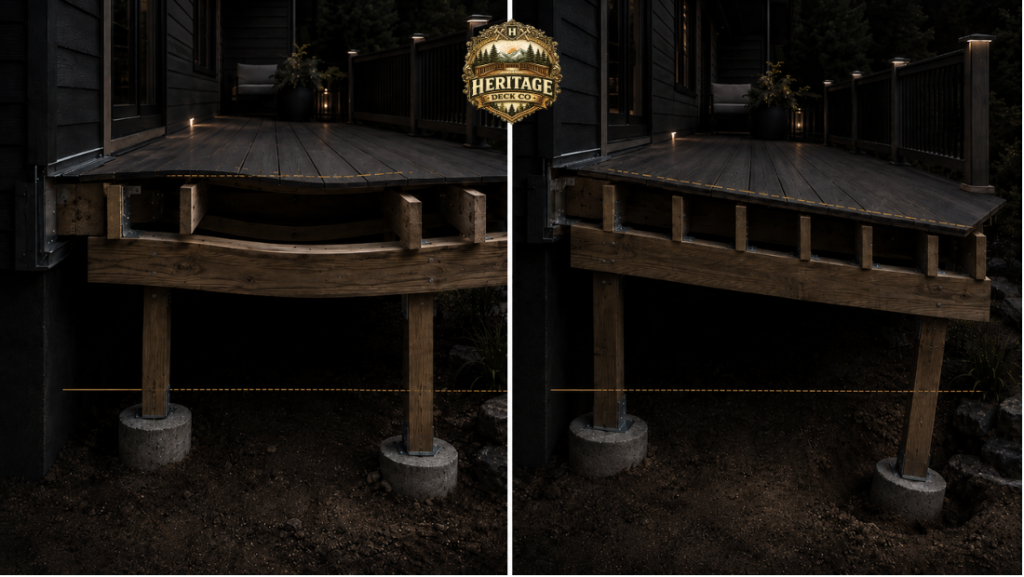
A sagging deck and a sinking deck are different problems. Sagging starts in the framing. A weak joist, an undersized beam, or a loose ledger board lets the surface dip or bounce in specific spots.
A sinking deck points to the support system instead. Posts settle. Footings sit too shallow or shift after freeze-thaw cycles. Soil erosion or poor drainage can pull the whole structure down evenly.
The two often overlap. A sinking post stresses the beam it holds, and that stress sags the joists above it. Diagnosing which one started the failure matters, since fixing joists won’t help if a footing is still moving underneath.
Common Causes of a Sagging Deck
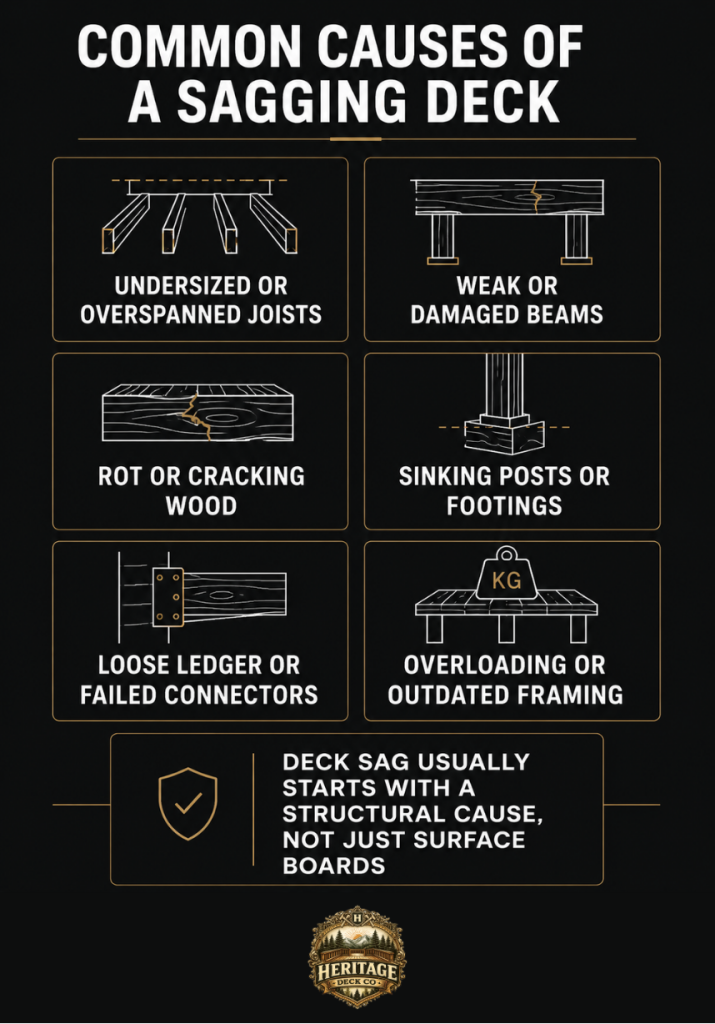
Undersized or improperly spaced joists
Joists that are too small, spaced too far apart, or that exceed their recommended span can flex under normal loads. The International Residential Code (IRC) sets minimum joist sizes and span limits, and ignoring these requirements can lead to a deck that bounces, dips, or sags within a few years.
Rot and moisture damage
Water exposure from poor drainage, trapped moisture, or inadequate sealing can weaken deck boards and framing. Cracked or rotted joists lose their strength, allowing sections of the deck to sag under weight.
Settling posts and footings
Deck supports can shift due to soil movement, frost heaving, or improperly installed footings. When posts sink or move out of alignment, the entire frame can become uneven, placing extra stress on the joists.
Ledger board or connection failures
Attached decks depend on strong connections to the house. Loose ledger boards, missing flashing, failed fasteners, or rusted joist hangers can reduce support and cause parts of the deck to pull away or drop.
Excessive weight
Decks are designed for specific load limits, and exceeding those limits can overstress the framing. Features like hot tubs, large outdoor kitchens, or other heavy structures may cause sagging if the deck was not built to support them.
Aging framing
Older deck framing often develop problems from years of weather exposure and normal wear. Deteriorated lumber, outdated framing methods, and weakened connections can gradually reduce the deck’s stability and cause visible sagging.
How to Fix Sagging Deck Joists
- Inspect the joists – Check for rot, cracks, bowing, or insect damage; test weak areas with a screwdriver.
- Replace weakened joists – If a screwdriver sinks more than ¼″ with little resistance, the joist may need replacement instead of repair.
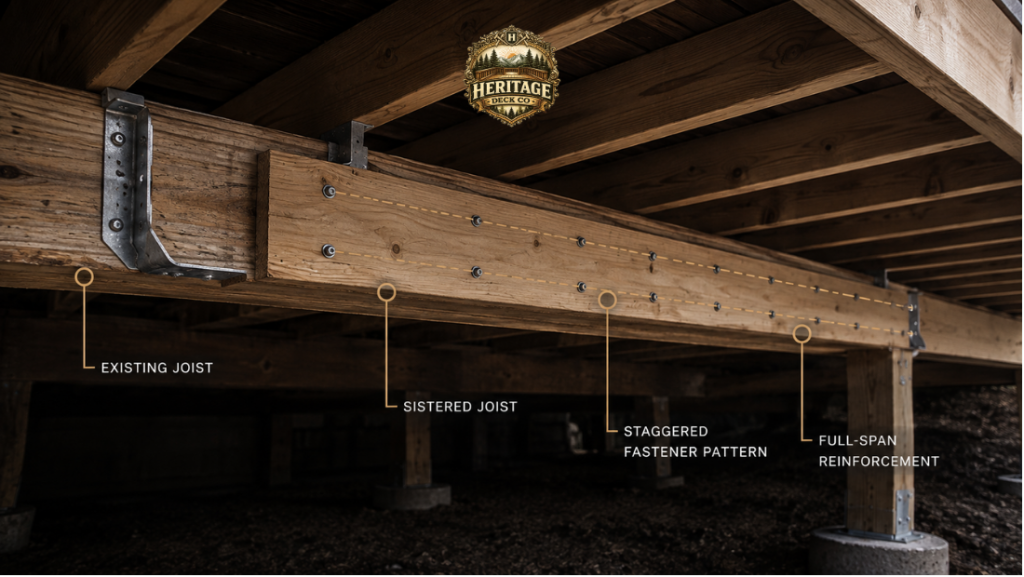
- Sister sound but bowed joists – Add a matching joist alongside the damaged one and secure it with structural screws or bolts.
- Replace severely damaged joists – Cracked or heavily rotted joists should be replaced, not reinforced.
- Add blocking and repair connections – Install missing blocking and replace damaged hangers or fasteners to improve stability.
- Check span and spacing – Confirm joist size, spacing, and species meet joist span and spacing requirements.
Sistering vs. replacement
Sistering a sound but bowed joist is usually the quickest repair, taking about 1-2 hours per joist. The process involves adding matching lumber alongside the existing joist and securing it with bolts.
A full joist replacement typically takes 2-4 hours per joist because the damaged member must be removed, new hangers installed, and the replacement joist fitted. Footing repairs are more involved, requiring excavation, forming, pouring, and curing, which can take 1–2 days per footing.
Costs vary based on lumber size, local labor rates, and access under the deck, but the biggest difference is time. Sistering is often a same-day repair, while footing work requires a longer construction process.
How to Fix a Sinking Deck
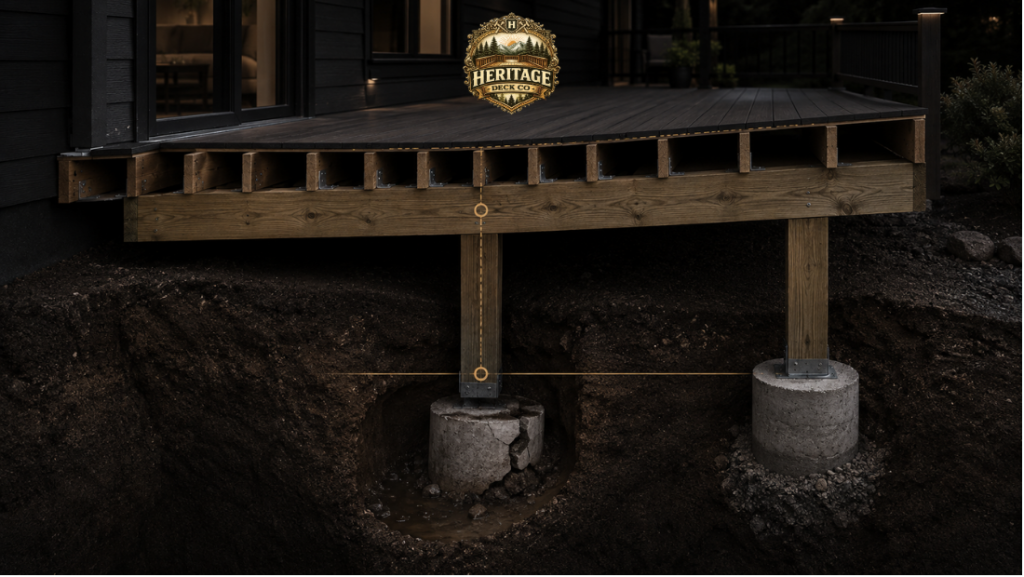
- Check post height and alignment – Measure posts against a level line to identify which supports have settled or dropped.
- Inspect the footings – Check for cracks, shifting, shallow installation, or poor drainage; most sinking decks trace back to unstable or inadequate footings.
- Verify the local frost line – Footings must extend below the local frost line to prevent movement from freeze-thaw cycles; depth varies by region, from about 12″ in warm climates to 60″ or more in colder areas.
- Improve drainage around supports – Reduce water buildup because saturated soil shifts more easily than dry, compacted ground.
- Repair or replace failed supports – Replace rotted posts and repair or repour damaged or undersized footings at the correct local depth.
- Re-level the deck last – Adjust the frame only after the support system is stable to prevent the sagging from returning.
How to Support a Sagging Deck
Before making repairs, temporarily brace the deck to stabilize the structure and prevent further movement or collapse during the work.
The repair depends on the failed component. Overloaded beams may need additional posts, weak beams may need replacement, and sound but sagging joists can often be sistered with new lumber. Damaged joist hangers should be replaced with code-rated hardware, and shifted or cracked footings must be repaired before work above them.
Ledger connections require special attention because they secure the deck to the house. Use properly rated lag screws or through bolts spaced according to code, not nails. Once the ledger is secure, blocking between joists can restore lateral stability.
If multiple components are failing, reinforce the entire frame rather than repairing only one area.
Do Not Jack Up a Deck Before Inspection
Jacking up a sagging deck without first inspecting it can turn a fixable problem into a dangerous one. Old connections settled into their sagged position aren’t built for sudden movement, and lifting can stress fasteners and joints that are barely holding on.
Stairs and railings, attached to the same structure, shift too. A staircase aligned during the sag can pull away or land wrong once the frame moves. The ledger board is even more exposed, and forcing it toward level can pull loose fasteners or crack it, and that connection is what keeps the whole deck attached to the house.
Posts and beams can move unexpectedly when weight shifts off them, which is why temporary bracing is often needed before lifting begins. For severe sagging, a full inspection should come before anyone touches a jack.
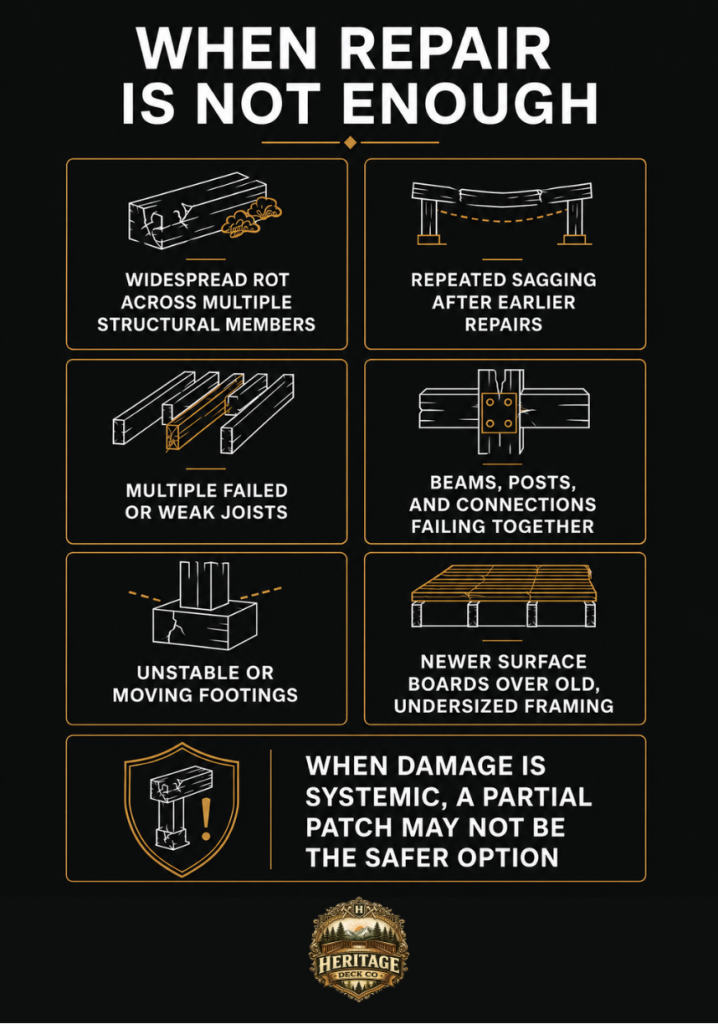
When Repair Is Not Enough
Some decks are beyond small repairs and require full replacement or major reconstruction. Warning signs include:
- Widespread rot – Soft or crumbling wood across multiple joists, beams, and posts often means the entire frame is failing.
- Multiple sagging joists or moving footings – Three or more sagging joists in one area or noticeable footing movement can indicate a larger structural problem.
- Failed ledger connections – An unstable ledger is a serious issue because it is a key load bearing connection between the deck and house.
- Repeated repairs in the same area – If sagging returns after repairs, the underlying framing issue may not have been fixed.
- New decking over outdated framing – Fresh boards cannot solve problems caused by undersized, damaged, or non compliant structural components.
Final Takeaway
A sagging deck rarely comes from one single cause. It’s joists, posts, footings, and connections, each able to drag the others down. Knowing how to fix a sagging deck means treating it as a diagnosis first and a repair second, not the other way around.
The fixes themselves aren’t complicated. Sistering a joist, repouring a footing, swapping a nailed ledger for lag screws, none of it requires guesswork once the cause is clear. What matters is matching the repair to what’s actually failing underneath the boards. Skip that step, and the sag comes back within a season. Get it right, and the deck holds for years, not months.